
Released in 2017, Nintendo Switch is still as popular today as it was years ago. The hybrid handheld console has seen dozens of high-profile game throughout its lifespan, and it shows no signs of slowing down. Part of what makes the device so compelling is the ability to play in both handheld or docked mode — allowing you to project your game onto the big screen when you get home from work or school.
It might seem complicated, but connecting your Nintendo Switch to a TV is simple. It takes just a few moments to set up its dock and get back to gaming, though there are a few caveats to be aware of before starting the process.
Setting up the Nintendo Switch
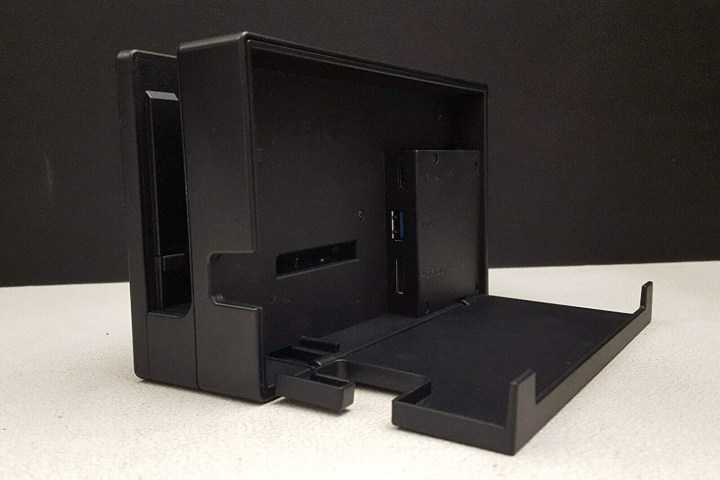
For those who are new to the system, every purchase of the Nintendo Switch not only includes the Switch itself but also a Switch dock. This dock will be key in putting your system together for the TV. The first thing you’re going to want to do is take out the dock and all the cords. Make sure that you have the dock, an HDMI cord, and a power cord for the system. If all three are present, you’re good to start!
Step 1: Begin by opening the back of the docking system. This will give you access to where all the cords are going to go. Additionally, you’ll notice there is a space for the cords to lead out from. The back of the Switch should have three outlets. From top to bottom, they are the AC adapter, USB, and HDMI out. You’ll only need the AC adapter and the HDMI out to hook the system up.
Step 2: Take one end of the HDMI cable and insert it into the bottom terminal, aptly named HDMI out. Then connect the other end of the HDMI port to the TV or monitor of your choosing.
Step 3: Take the AC adapter (which should be model No. HAC-002) and put it inside the dock labeled AC adapter. Then connect the other end of the AC adapter into a wall outlet.
Step 4: You can now go ahead and close the back of the switch. Remember to keep an eye on where the cords feed out to ensure you don’t actually damage the cords. Both cords should fit through the space without any problems.
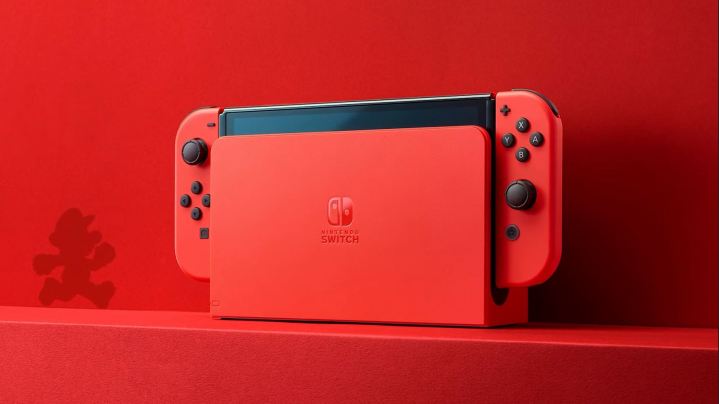
Step 5: Now the dock is all set up! You’ll just have to put the console into the dock to get rolling. When placing the console into the dock, ensure that the LCD screen faces the same direction as the face of the dock. The LCD screen of the Switch will turn off once it’s perfectly docked.
Step 6: All you’ll have to do from here is turn the TV and Switch on, set the TV to the correct HDMI, and your Switch should be ready to go!

How to connect your Nintendo Switch to a TV without a dock
If your dock happens to break, you can still use your Nintendo Switch on the big screen. Before getting started, you'll need to buy a USB-C to HDMI adapter that has both USB-C and HDMI ports. This will essentially replace the original dock and serve to get your Switch communicating with your TV.
Here's what you'll need to do to get your Nintendo Switch connected to your TV without a dock.
Step 1: Remove the USB-C power cable and HDMI cables from the original Switch dock.
Step 2: Insert the USB-C cable and HDMI cables into the adapter you've purchased.
Step 3: Connect the USB-C adapter to your Switch.
Step 4: As long as you've selected the right input on your TV, you should now be able to play Switch on your TV without a dock.
Step 5: Note that this method will not work with Switch Lite. Also, be careful about overheating your Switch — try propping the unit upright to keep its vents accessible and open to airflow.
Small notes
There are a few things that you should keep in mind as you’re hooking your system up. The first, and one of the most important, is to always handle the console with care. Although the Switch is a durable gaming system, that doesn’t mean it’s impervious to damage. Set the console into the dock gently in order to avoid scratches or damages, which is a problem a few players have reported. It may also behoove you to pick up a screen protector for the system to ensure that docking the Switch doesn’t do more damage than good.
Also, in order to play the Switch, you’ll need to have both of the Joy-Cons in your hands. You can either remove the Joy-Cons before docking the Switch or after. However, keep in mind that if the Joy-Cons haven’t been attached to the console before this moment in time, you’ll need to register them before playing. It’s similar to how the Wii would need the Wiimotes synced with the system before use.
Finally, after every Switch session, it may be helpful to you if you unplug the Joy-Cons and put them back onto the docked Switch. The Joy-Cons will drain the battery while unplugged from the console, so leaving them out overnight could risk the Joy-Cons being drained of battery. Try to make a habit of putting the Joy-Cons back onto the docked console to ensure they’re being charged while you’re not playing. Nothing is worse than a controller dying as you’re facing off with Ganondorf, so be sure to stay in the battle with powered Joy-Cons!
Editors' Recommendations
- Everything announced at February’s Pokémon Presents stream
- How to connect AirPods to Xbox Series X
- Nintendo Switch Game Vouchers: how they work and eligible games
- How to make a fishing rod in Lego Fortnite
- How to change your ship’s name in Helldivers 2


